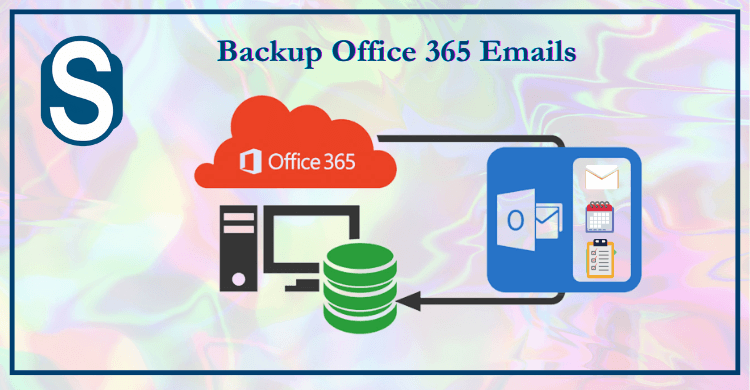
Nowadays, the majority of business enterprises use Microsoft Office 365 to manage emails. It is a cloud-based service that offers so many features and facilities to its users. Office 365 offers various productive applications such as Outlook, Skype, Word, Excel, and many others applications. As we researched, many organizations now wish to backup Office 365 emails for some common reasons. We all know backup is the best option for users to keep their data safe from unexpected situations. This is the primary reason for most organizations. Apart from this, there could be more factors that insist users take the backup of their data that we mentioned below.
Reasons why to take the backup of Microsoft 365 data
- It helps in avoiding some future mishaps like accidental data deletion, virus attacks, cyber-attack, etc.
- Users can easily restore their data if they lose their data.
- To free up some space, as we know, Microsoft provides only limited storage.
- Making the data easily accessible and portable to the local drive.
These common reasons encourage users to take the backup of their crucial data. For this, users desire a perfect solution that makes this task in easy and quick way. If you are also looking for the same, you will get an ideal solution for this task in this blog.
Solutions to back up Office 365 emails
Users can opt for the manual or professional third-party tool to Backup Office 365 Emails into local storage. The following paragraph will teach us the manual steps to accomplish this backup task. So, look at all the steps carefully to make this task in a hassle-free way.
How to back up Microsoft Office 365 data using the manual method?
Step1: Go to the Office 365 login and enter your account and password.
Step2: Open the Office 365 Admin center and choose the Security option.
Step3: Now move to the Permission option and then select eDiscovery manager from the options.
Step4: New window will open on your screen. Click the Edit button.
Step5: Opt for the eDiscovery administrator and press the Save button.
Step6: Navigate to the search tab and click the content search option.
Step7: Now, tap the New search.
Step8: Enter the name and description from the new search and press the Next button.
Step 9: Pick mailboxes you want to back up and click Next.
Step 10: Choose the keywords and apply conditions as per your requirements. Afterward, click on the Next button.
Step11: Review the settings for your search and click the Submit button.
Step 12: Go to the search list and choose the search that you created in earlier steps.
Step13: Thereafter, tap the Export button.
Step 14: Open the Export tab, choose your last export, and press the Download results.
Step15: Scroll down and copy the Export key.
Step 16: Open the eDiscovery tool to paste the Export key and then select the location where you want to save a backup.
Step 17: At last, press the start button; it will start to backup Office 365 emails instantly.
As we can see, this process is lengthy and has various steps to perform this backup task. Besides this, it has some drawbacks as well that may complicate this process. Let us discuss the limitations of this manual method.
Why do professionals not opt for the manual method?
- Users can not choose the particular items to backup Office 365 emails with the manual method.
- It can also alter the data while processing the backup task.
- The manual method requires technical hands to operate effectively.
- Novice users may face some unexpected situations if they don’t have proper technical knowledge.
- Users do not pause or resume the process once it gets started.
- It doesn’t provide a guarantee of 100% accuracy.
Due to these drawbacks of the manual method, users look for a professional third-party tool to backup Office 365 emails without any limitation. For this, we recommend you try the tool mentioned below, which comes with various advanced and new features.
Professional third-party tool to backup Microsoft 365 data
Shoviv Office 365 Backup and Restore Tool is a standalone utility that has proficiency in taking backups and restoring Office 365 data. It works at the fastest speed and provides quick backup results without any difficulty. The structure of the folder and data integrity remains as it is even after taking the backup of MS Office 365 data. Moreover, it offers many file formats to save Office 365 mailboxes. It also provides various facilities to its users that help them to do this task in an effortless way.
- As it offers a straightforward user interface, anyone can backup Office 365 emails with this software.
- Users do not require any technical skills to understand the whole process of this tool’s working.
- It also provides a filter option that users can use to take the backup of particular items. Users even add the necessary items as well as remove unwanted ones with the help of this filter facility.
- Moreover, it gives a 100% guarantee to backup Office 365 emails accurately without misplacing or damaging any item.
- Users can take a preview of selected mailboxes before going through the backup process.
- This software permits users to schedule the backup job as per their requirements, like daily, weekly, or monthly.
- It allows users to backup Office 365 emails in PST, HTML, MSG, EML, and many other file formats.
Users can also try out its free trial version for a deep knowledge of its functionality and how it works. This free trial version will enable users to process the backup task with the first 50 items freely.
Working procedure of the Shoviv Office 365 Backup and Restore Tool
Step1: Download the Shoviv Office 365 Backup and Restore Tool.exe and install it.
Step2: Open the software and press Connect Office 365.
Step3: Provide the required details to connect with Office 365.
Step4: Navigate to the Backup directory and enter the name and path. After that, click Ok.
Step5: Go to the Backup jobs and select the mailbox type.
Step6: Pick the mailbox that you want to export.
Step7: Now filter items according to your need.
- Here you can include or exclude the items per date or folder-wise criteria.
- Check the Already Exported Item in All folders option.
Step8: Schedule the backup job to take back up on a regular basis. It provides three options Run the Job Manually, Start Immediately After Creating Job and Schedule the job.
Step 9: Now set the Thread count and Maximum login attempts. Here you can also set the timer for large mailboxes and the size for the resultant PST file.
Step10: After that, choose the file format that you want to prefer. Last, provide the name of the job and click Create Job button.
Step 11: The process to backup Office 365 emails will run in the next wizard.
Step12: Finally, click Finish after completing the backup process.
Conclusion
This blog provided us with the details on the manual and professional solutions to accomplish the backup task. After discussing both procedures, we suggest users move with the Shoviv Office 365 Backup and Restore Tool. This is the best way to backup Office 365 emails without having any trouble. For a better understanding of its compatibility, users can check out its free trial version, which is available on the official website of Shoviv.