In this article, we are discussing easy methods to add a countdown timer to WordPress websites. These clocks are useful for building up excitement about an upcoming event like a product launch. People can also display the timer on the homepage while their website is undergoing maintenance. This will be much better than showing the “under maintenance” message. The feature will be useful for not only businesspersons looking to create anticipation about their service.
It can also be helpful for individuals looking forward to personal milestones like weddings or birthdays. WordPress website owners can place these timers in their posts, pages, or the widgets area in the sidebar. They can do so easily by using plugins. The simple way in which the functionality of a website can extend encourages many people to migrate websites to WordPress. Let’s take a look at the methods to add countdown timers to WordPress interfaces.
1. Using A Countdown Timer Plugin
The simplest way to add a countdown timer is by using a plugin. The T(-) Countdown is one of the best plugins available for the purpose. Following is the step wise procedure to use the plugin:
Step 1
Access the admin dashboard of your WordPress installation and search for the plugin. Once the product is located, install and activate it on the website. The T(-) Countdown plugin enables users to add the feature through widgets or shortcodes.
Step 2
In order to display the timer in a widget area, go to Appearances> Widgets and drag the widget to a chosen location. In the image given below, we have placed the widget in the sidebar.

You can enter the name of the timer in the “title” field followed by the expiry date in the “target” field. It comes with various styling options that you can choose from the drop-down menu in the “style” section. There are some additional rockstar features that enable you to add custom HTML to above or below the timer.
Step 3
People wishing to exercise more control over the placement of the timer can use shortcodes. Following is a sample shortcode for a timer which will expire on 10 January 2019 at 06:01:01:
It also contains the text which will be shown after the timer expires. You can make changes to the above shortcode and use it for personalizing the timer.
2. Using A Coming Soon Page Plugin
The next method to add a countdown timer to WordPress is through a coming soon page plugin. These tools come in handy for creating an attractive page for a website that is going to be launched shortly. We will use the SeedProd Pro plugin in this tutorial.
Step 1
Install and activate the plugin on your website. After activation, you will be redirected to the Settings> General page. This is a paid product and you will have to enter the license key number in the specified field.
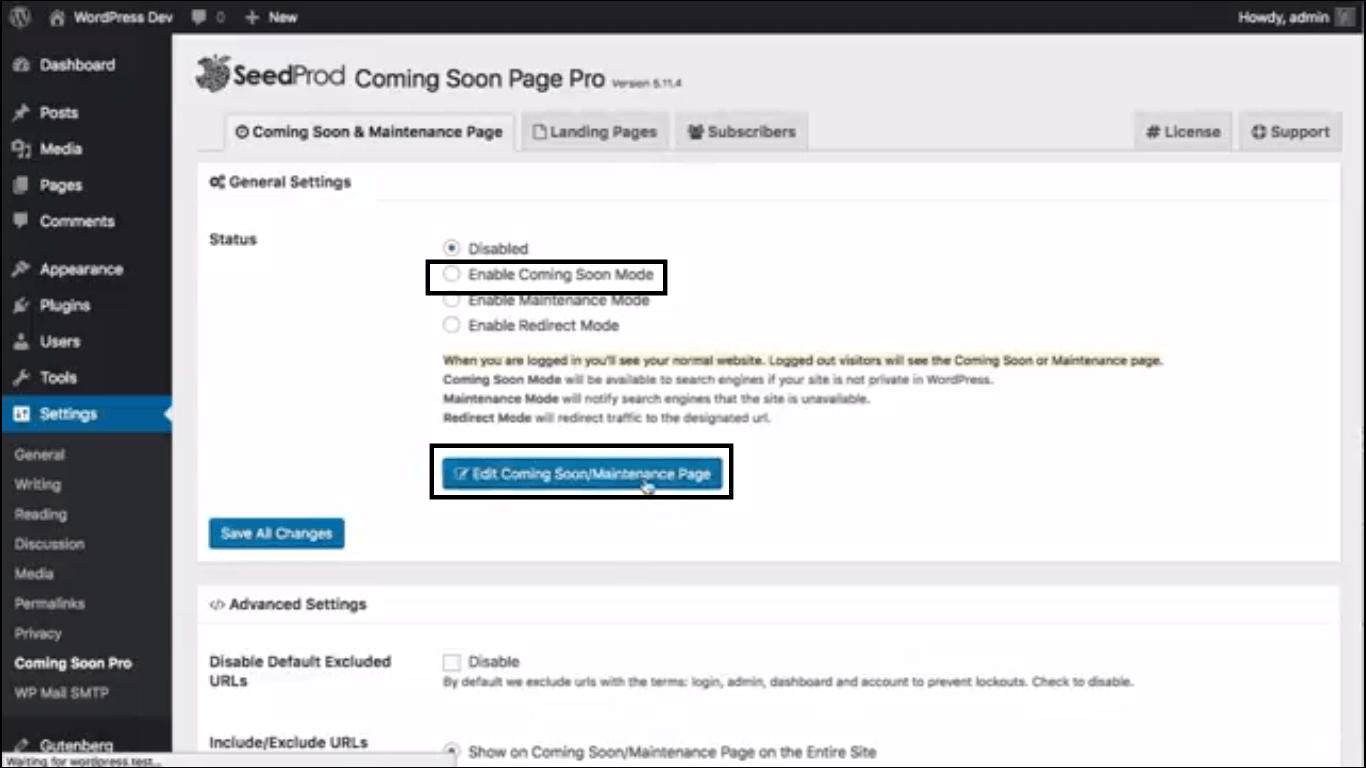
Step 2
Go to Coming Soon Pro settings for activating the countdown timer. Click on the “Enable Coming Soon Mode” option. Now click on the “Edit Coming Soon/ Maintenance Page” button at the bottom of the page. This will take you to a new page where you can select a theme for the timer.
Step 3
Once a theme has been chosen, you will see more options for customizing the timer in a sidebar menu.
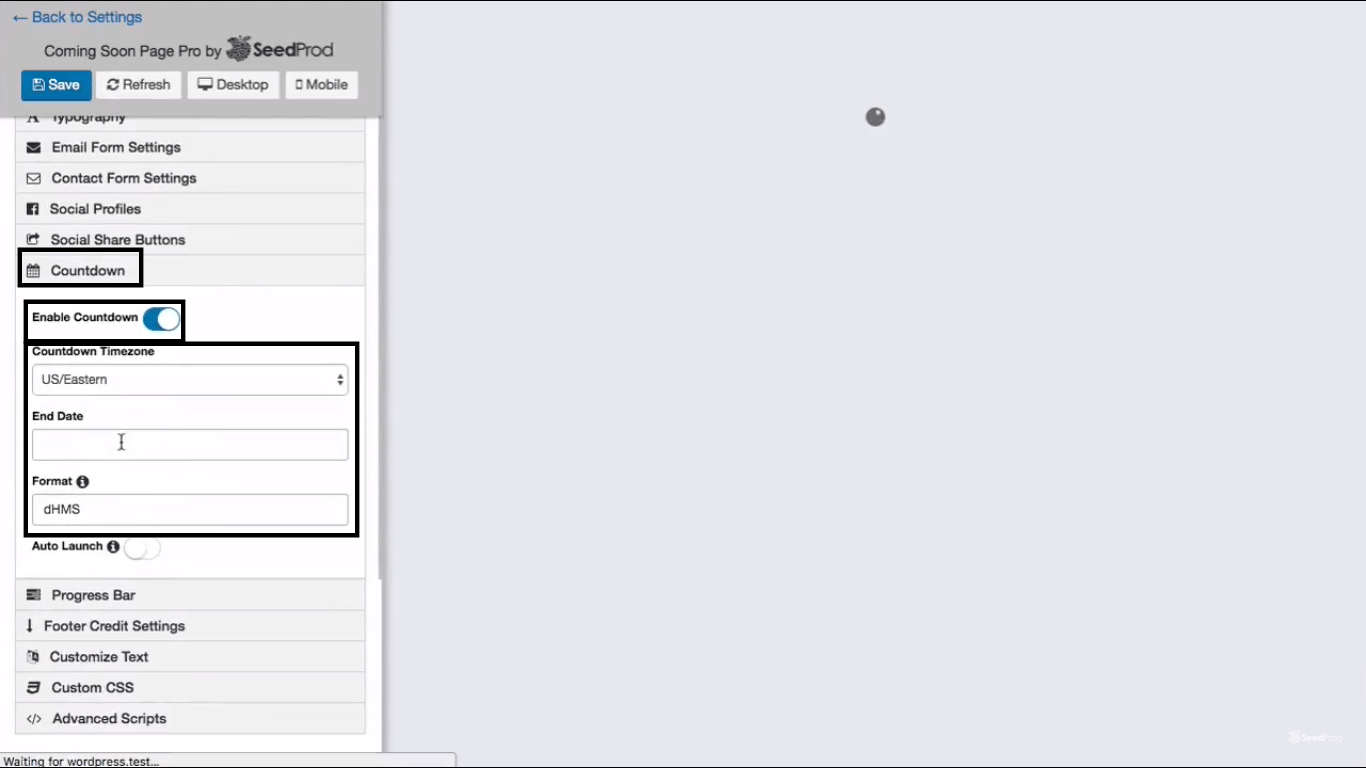
You can choose an appropriate timezone and the expiry date on which the timer will end. Make all the desired modifications and then click on the “Save All Changes” button to complete the process. The timer will now be visible on your website.
3. Using A Lead Generation Tool
WordPress users have the luxury to enjoy various beneficial tools. One such useful service is lead generation solutions which help in reducing the abandonment rate of websites. Some of these tools can also be used for integrating a countdown timer on an interface. In this article, we will use OptinMonster to introduce a timer on a website.
Step 1
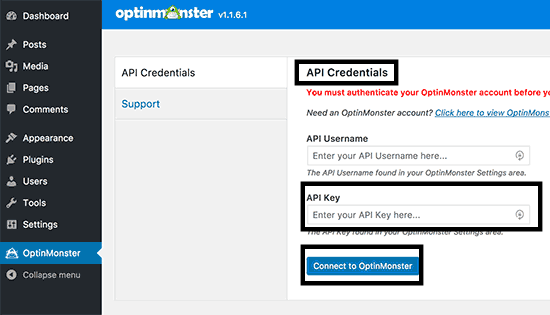
OptinMonster is a premium product and after choosing a suitable plan, its plugin must be installed and activated on the website. Log in to your account on the OptinMonster website and then click on “API” and copy the API key given there. Now go to the settings of the plugin in your WordPress installation and paste the key in the specified field. Click on the ‘Connect to OptinMonster’ button at the bottom to integrate your website with the service.
Step 2
Go back to your account on the service’s website. Create a countdown campaign according to your requirements and make it go live.
Step 3
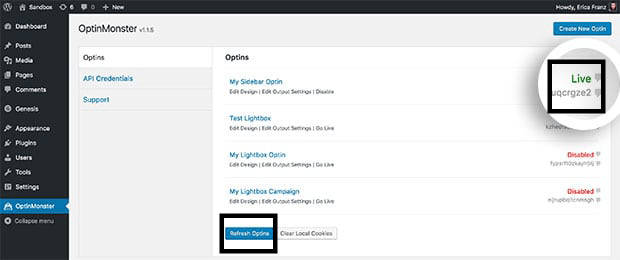
Now return to your WordPress admin dashboard and access WordPress Admin > OptinMonster > Campaigns. Click on the “Refresh Options” button and you will see your newly created campaign in the menu. Choose the “Go Live” option below its title and your timer will be displayed on the website.
Conclusion
These simple methods to add a countdown timer to a WordPress website will help businesses as well as individuals in creating a buzz around an event of their choice to generate better returns on investment.